Introduction to Docker
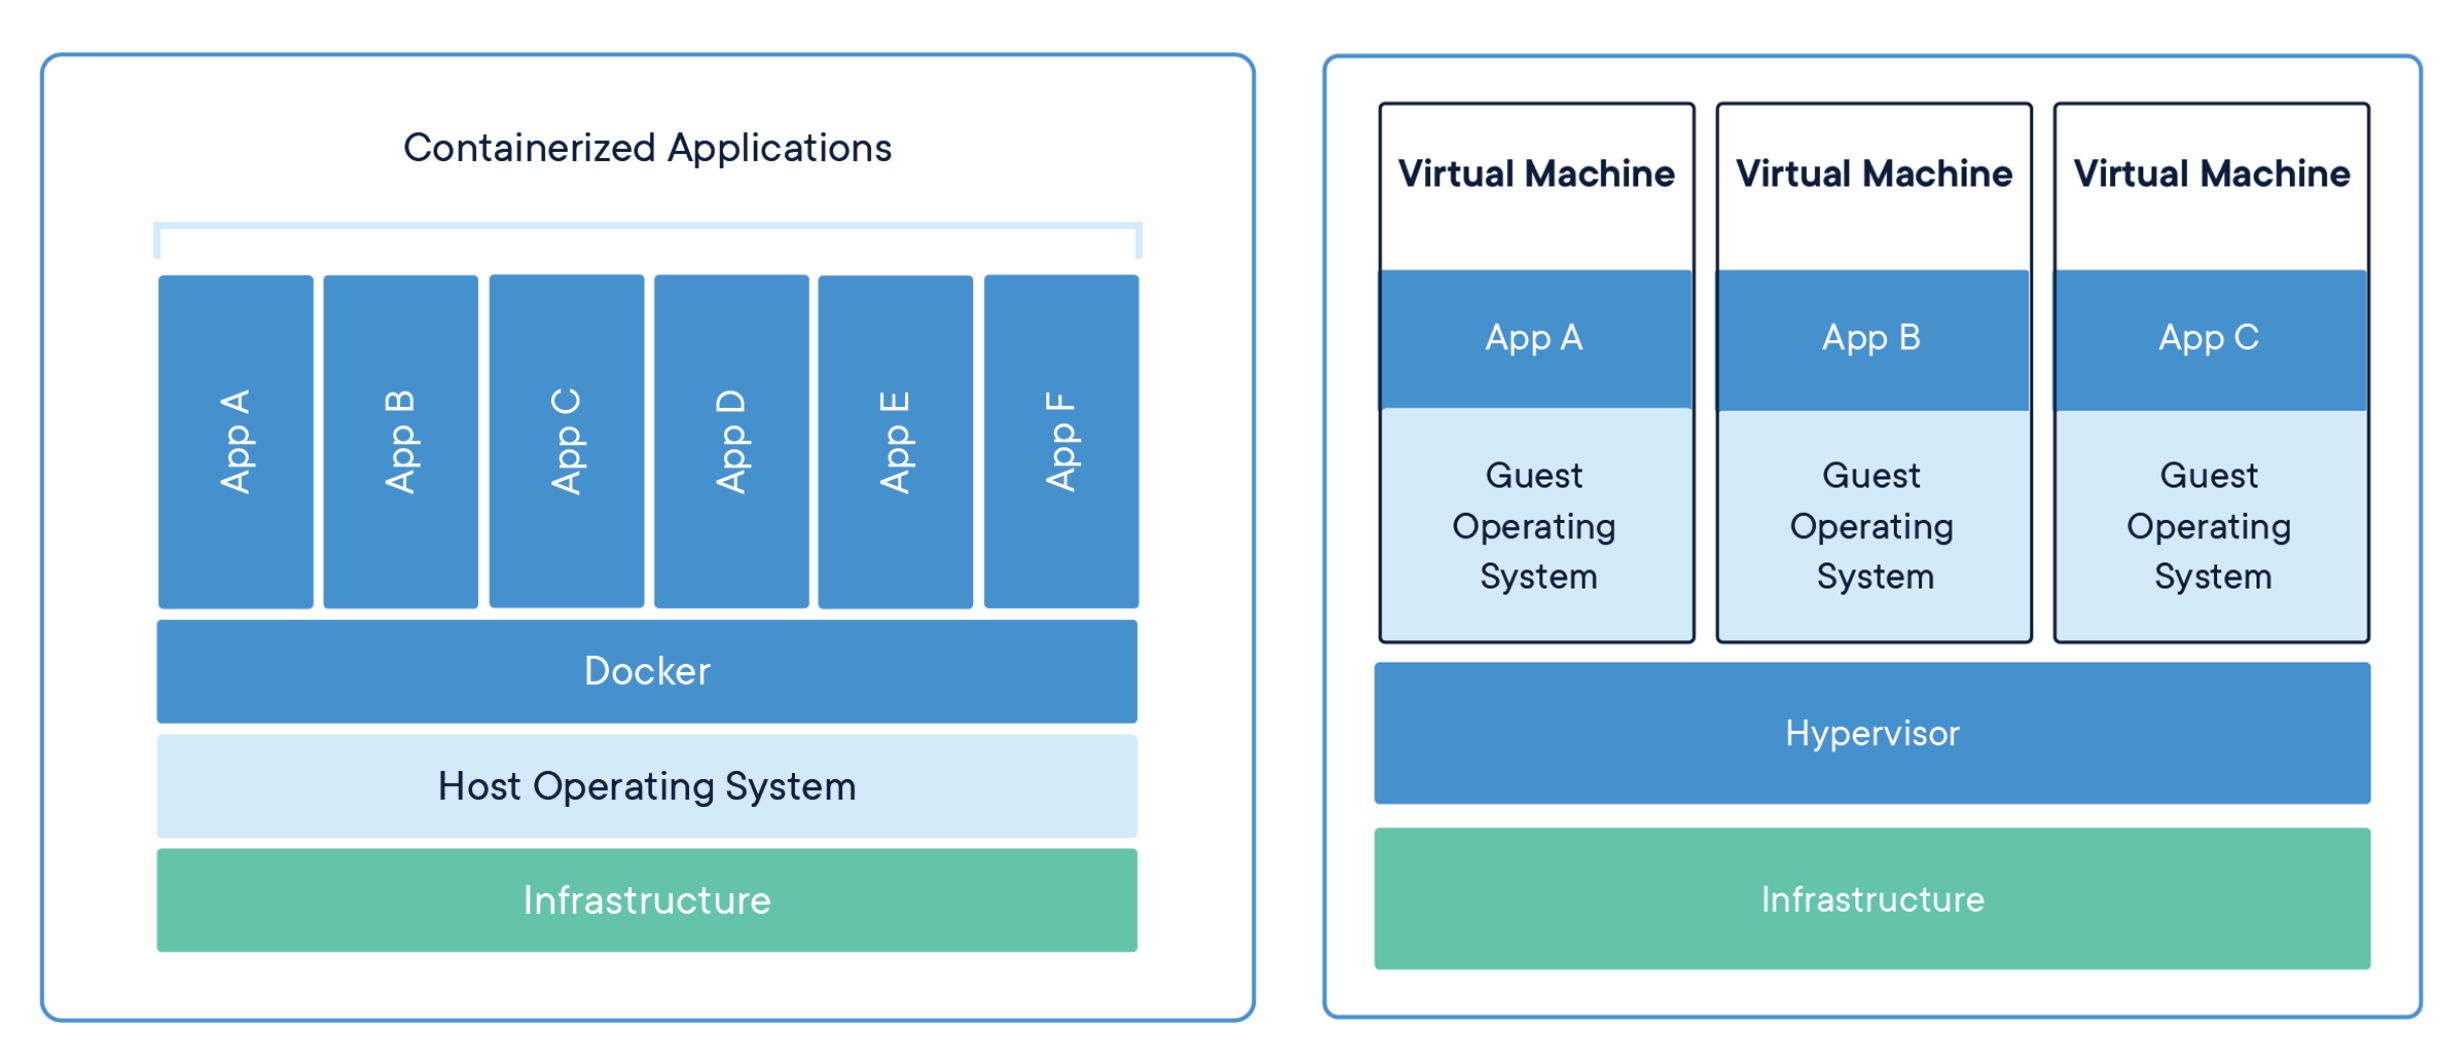
Many times we write programs and we want our programs to work properly without any external factors interfering. or do not want our program to affect other programs in the machine We may take our program to run in the Virtual Machine (VM) to solve the above problem.
But using a VM has its limitations. Our computers need a lot of resources in order to emulate and run an OS in one VM. The CPU and RAM are used as if another computer shared its resources. Just bring it to our program to run only one. And it’s even worse when we want to run multiple programs.
both the use of resources both the speed of opening and closing those programs and the difficulty in managing to fix All these problems can be avoided by using Docker.
What is Docker?
- Docker is a platform for creating and running containers.
in long version…
Docker is an open platform for developing, shipping, and running applications. Docker enables you to separate your applications from your infrastructure so you can deliver software quickly. With Docker, you can manage your infrastructure in the same ways you manage your applications.
- The container is an instance of an image that runs a program.
- The container is a process or a set of processes that have a grouping of resources specifically assign to it.
- After we installed Docker, then we automatically installed Linux Virtual Machine.
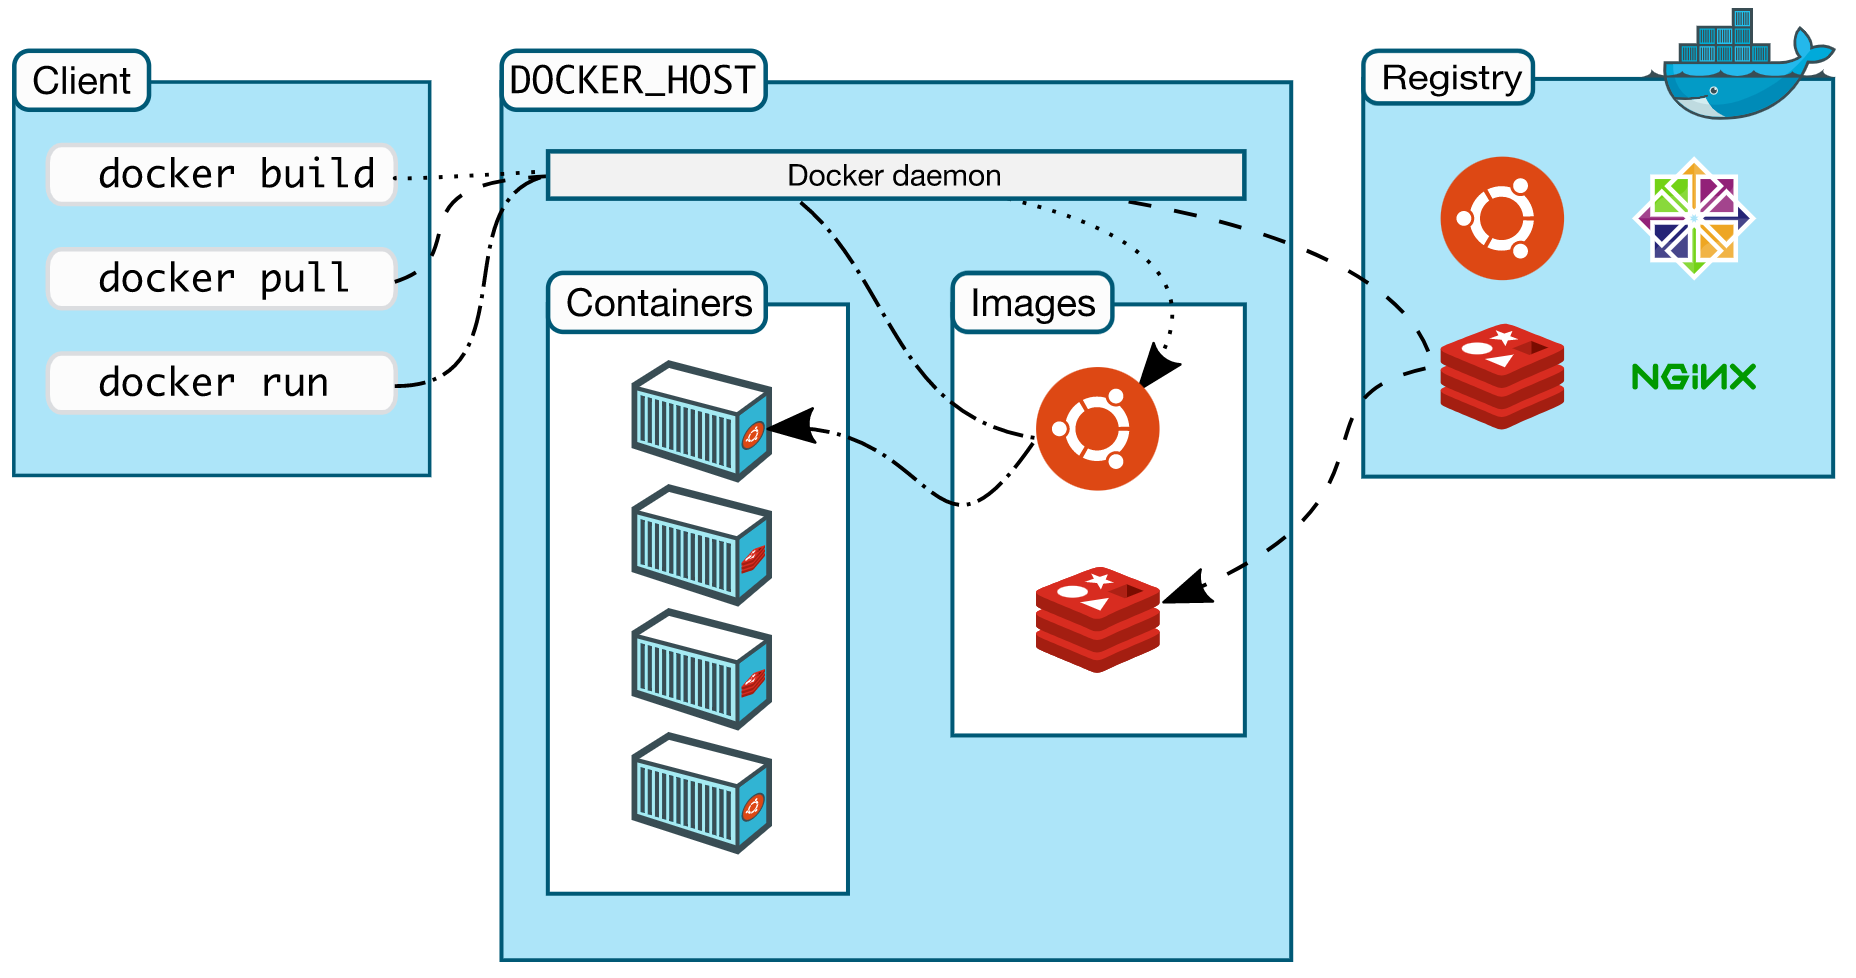
Docker Architecture
Docker uses a client-server architecture. Docker client talks to Docker Daemon (server) via REST API
const container = new Image()
Why use Docker
Docker helps us run software without worrying about setup or install dependencies.
- Install and run dependencies in minutes.
- Manage isolated applications.
- Use your favorite development tools, editors, and workflows.
- Distribute your web application to others on your team.
- Deploy your application to live production servers.
Docker Installation
Depends on your operating system, you can follow the installation instruction from Docker Official website. After install successfully, you can verify installation with command:
docker --version

Docker version 20.10.12, build e91ed57
## if you this message above, which means docker is successfully installed
Docker CLI
Here are some frequency use commands to manage images and containers.
docker run <IMAGE_NAME>run specific imagedocker run <IMAGE_NAME>command but those specific commands must be specified in the image- docker run behind the scene is
docker create <IMAGE_NAME>+docker start -a <CONTAINER_ID> docker pslist currently running containers -a for list all containersdocker system prunedelete all containersdocker logsretrieve messages from the containerdocker stop <CONTAINER_ID>stopSIGTERM(Terminate signal) stop the process inside the container and shut the container downdocker kill <CONTAINER_ID>killSIGKILLimmediately shutdowndocker exec -it <CONTAINER_ID>execute interactive mode in containerdocker exec -it <CONTAINER_ID> shexecute with command processors (shell)- If you open 2 terminal windows and run the same command ie.
docker run -it busybox shthen you’ll get an isolated container it means there is nothing relate between container A and B
Create Docker Images
Dockerfileis a configuration file on how the container should behave. A Dockerfile is a text document that contains all the commands a user could call on the command line to assemble an image. Usingdocker buildcommand, users can create an automated build that executes several command-line instructions in succession.
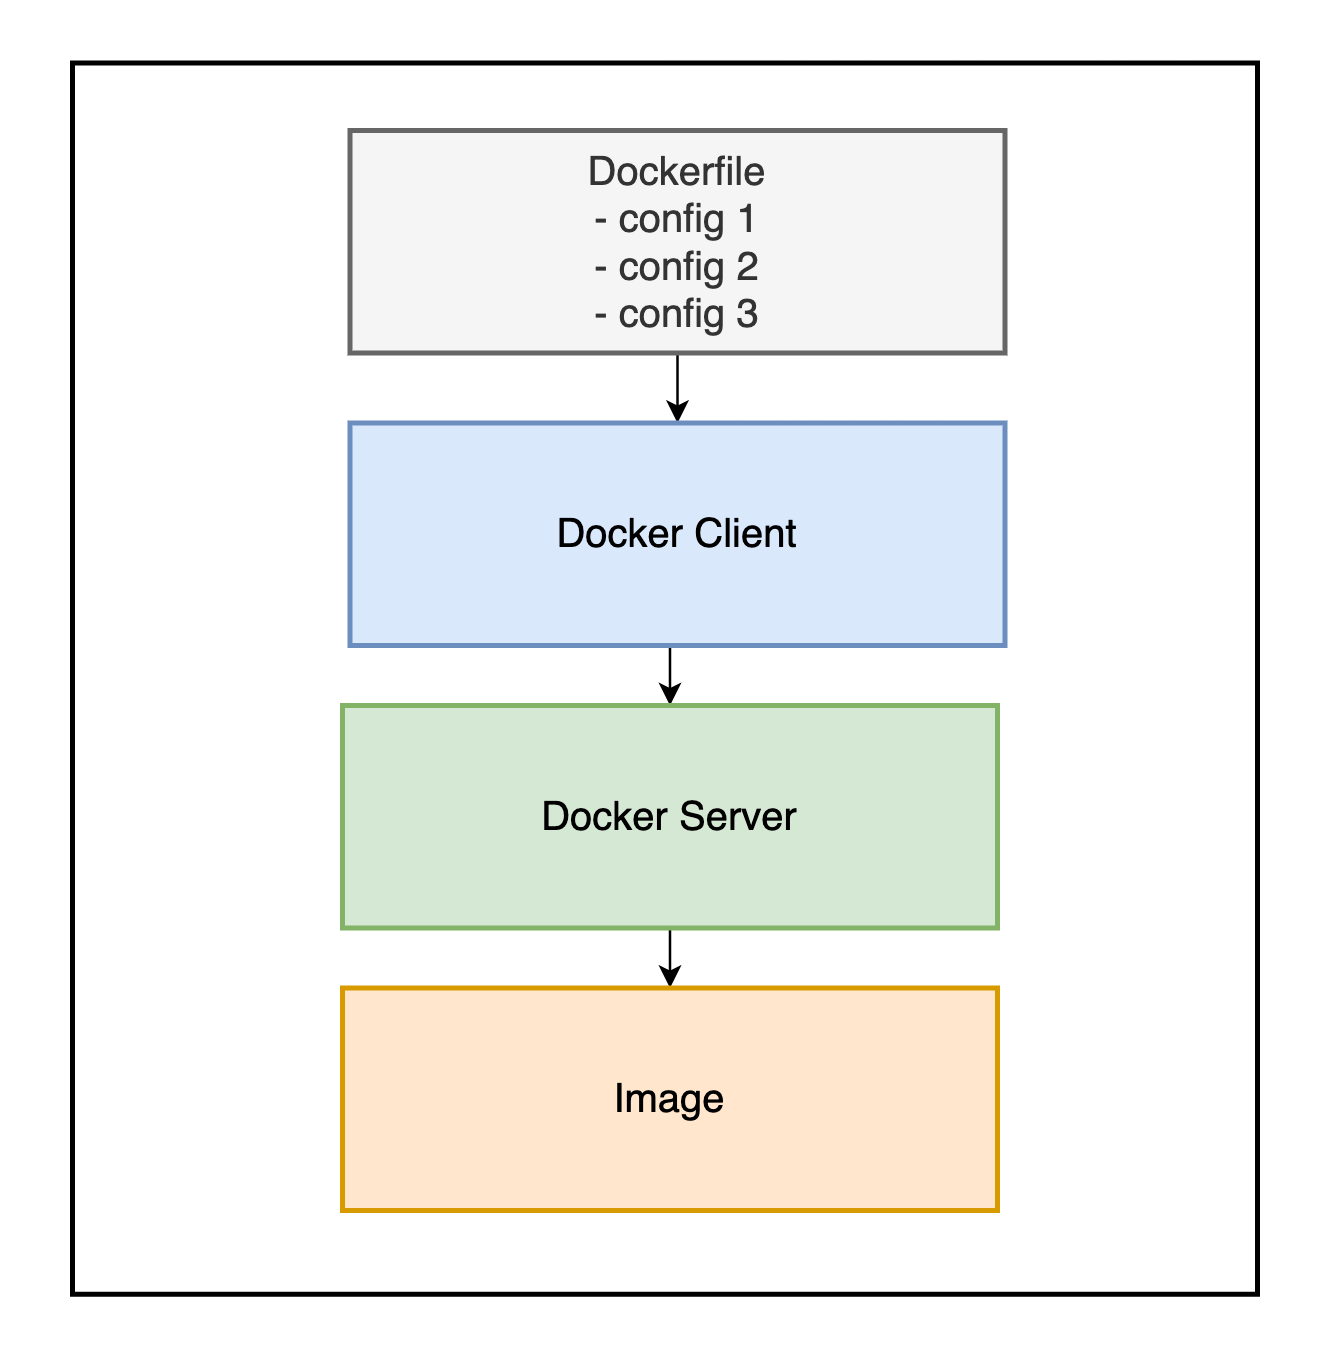
Behind the scene
-
Provide configuration or commands in
Dockerfile -
Docker client provides the file to Docker server.
-
Docker server will look inside the Dockerfile and build a usable image for us.
Example building Redis image
# Use an existing docker image as a base
FROM alpine

# Download and install a dependency
RUN apk add --update redis

# Tell the image what to do when it starts as a container
CMD [ "redis-server" ]
in the Terminal
docker build .
here is output we got
[+] Building 9.4s (7/7) FINISHED
=> [internal] load build definition from Dockerfile                                                                              0.1s
=> => transferring dockerfile: 242B                                                                                              0.0s
=> [internal] load .dockerignore                                                                                                 0.1s
=> => transferring context: 2B                                                                                                   0.0s
=> [internal] load metadata for [docker.io/library/alpine:latest](http://docker.io/library/alpine:latest)                                                                  5.0s
=> [auth] library/alpine:pull token for [registry-1.docker.io](http://registry-1.docker.io/)                                                                     0.0s
=> [1/2] FROM [docker.io/library/alpine@sha256:eb3e4e175ba6d212ba1d6e04fc0782916c08e1c9d7b45892e9796141b1d379ae](http://docker.io/library/alpine@sha256:eb3e4e175ba6d212ba1d6e04fc0782916c08e1c9d7b45892e9796141b1d379ae)                   1.8s
=> => resolve [docker.io/library/alpine@sha256:eb3e4e175ba6d212ba1d6e04fc0782916c08e1c9d7b45892e9796141b1d379ae](http://docker.io/library/alpine@sha256:eb3e4e175ba6d212ba1d6e04fc0782916c08e1c9d7b45892e9796141b1d379ae)                   0.0s
=> => sha256:eb3e4e175ba6d212ba1d6e04fc0782916c08e1c9d7b45892e9796141b1d379ae 1.64kB / 1.64kB                                    0.0s
=> => sha256:be9bdc0ef8e96dbc428dc189b31e2e3b05523d96d12ed627c37aa2936653258c 528B / 528B                                        0.0s
=> => sha256:021b3423115ff662225e83d7e2606475217de7b55fde83ce3447a54019a77aa2 1.47kB / 1.47kB                                    0.0s
=> => sha256:29291e31a76a7e560b9b7ad3cada56e8c18d50a96cca8a2573e4f4689d7aca77 2.81MB / 2.81MB                                    1.4s
=> => extracting sha256:29291e31a76a7e560b9b7ad3cada56e8c18d50a96cca8a2573e4f4689d7aca77                                         0.3s
=> [2/2] RUN apk add --update redis                                                                                              2.2s
=> exporting to image                                                                                                            0.1s
=> => exporting layers                                                                                                           0.1s
=> => writing image sha256:7be6457499ed65fa0dc5189563201329a73fcdeda144ca49ba669671b80f296a
Actually 7be6457499ed is enough to run the container, then run
docker run 7be6457499ed
open another terminal window and run redis-cli then you can access your own Redis image you built.
Dockerfile in details
FROMspecify Docker image we want to use as base image. In this case is used thealpineLinux as a base image which means, this image already has pre-installed some programs.RUNexecute some commands while we are preparing the imageCMDcommand instruction to run when the image is used to start up the container
all above are the most commonly used in Dockerfile
docker build command
Take the Dockerfile and build an image with it . is a build context. In this case, we’ve used the current directory to build the image.
Building the image with tag
docker build -t DOCKER_USERNAME/YOUR_IMAGE_NAME:version
- docker username
- image name
- version (lastest)
then you can run
docker run DOCKER_USERNAME/YOUR_IMAGE_NAME:version
Create a simple Node.js web application
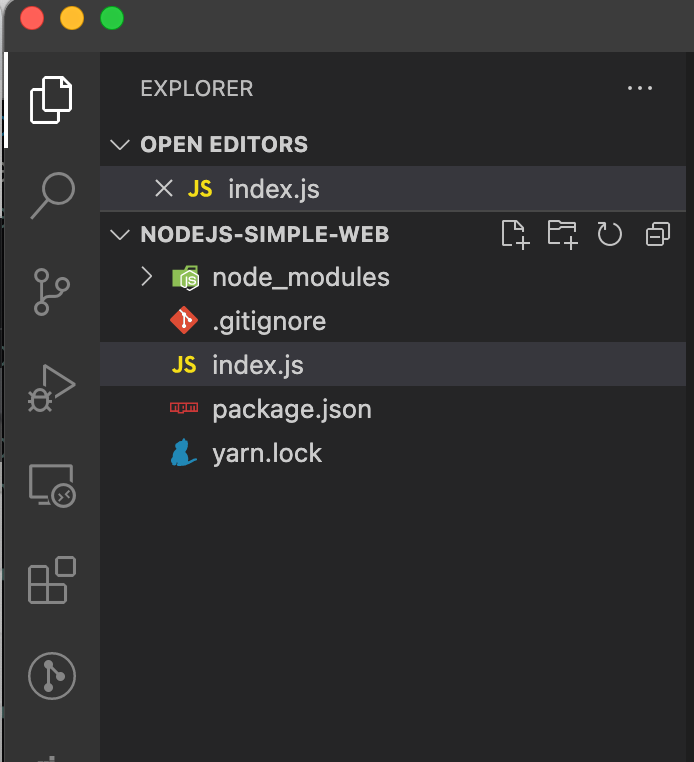
Here is the project folder structure
Here is package.json
{
  "name": "nodejs-simple-web",
  "version": "1.0.0",
  "description": "",
  "main": "index.js",
  "scripts": {
    "start": "node index.js"
  },
  "keywords": [],
  "author": "",
  "license": "ISC",
  "dependencies": {
    "express": "^4.17.1"
  }
}
Let’s create simple Node.js server and serve some content
const express = require('express');
const app = express();

app.get('/', (req, res) => {
  res.send(`
    <h1>Hi, I'm running in Docker</h1>
  `);
});

app.listen(8080, () => {
  console.log('server start on port 8080 🚀');
});
Let’s create the Dockerfile
FROM node:alpine

WORKDIR /usr/app

COPY ./ ./

RUN npm install

CMD ["npm", "start"]
Here are steps by steps explanations
- use base
node:alpinebase image. - Define
/user/appas a working directory inside the container. - Copy everything inside our current directory to the working directory (as above
/usr/appis a relative directory to./ - Run command when the container has started.
- Run
npm startcommand to start the application. - In our terminal, run
docker build . -t xeusteerapat/nodejs-simple-web
then run the container
docker run -p 8080:8080 xeusteerapat/nodejs-simple-web
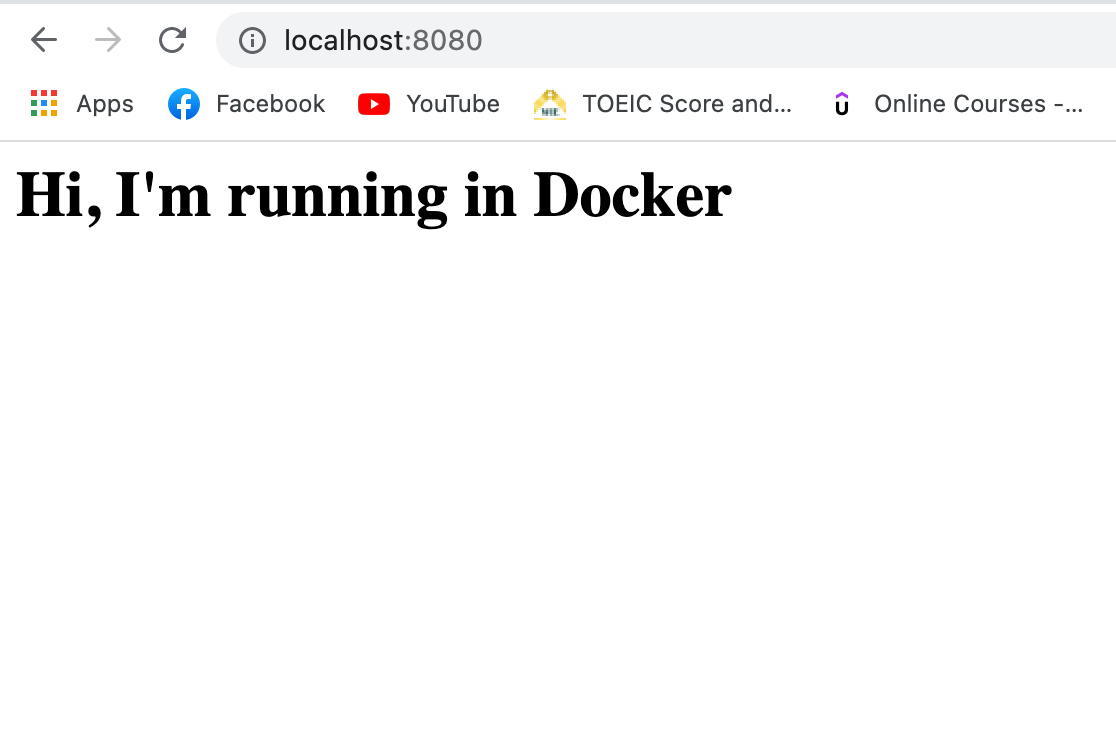
Let’s visit http://localhost:8080 in the web browser then you should see something like the picture below
Managing multiple local containers using Docker compose
Imagine we create a Node.js application to receive the request and counting the number of visitors by saving data to the Redis. Normally, we’ll never use Docker CLI to manage multiple containers in this case. Instead, we’ll use Docker Compose
Docker Compose is a tool for defining and running multi-container Docker applications. By creating a docker-compose.yml file to configure your application’s services.
Here is Node.js application
const express = require('express');
const redis = require('redis');

const app = express();
const redisClient = redis.createClient({
  host: 'redis-server',
  port: 6379,
});

redisClient.set('visits', 0);

app.get('/', (req, res) => {
  redisClient.get('visits', (err, visits) => {
    if (err) {
      throw new Error('Something wrong');
    }

    res.send(`
      <h1>Number of visitors is: ${visits}</h1>
    `);

    redisClient.set('visits', Number(visits) + 1);
  });
});

app.listen(8081, () => console.log('server running on port 8081'));
Then create Dockerfile to build Node.js app image
FROM node:alpine

WORKDIR '/app'

COPY package.json .

RUN npm install

COPY . .

CMD ["npm", "start"]
then create docker-compose.yml in the root directory.
version: '3'
services: # type of containers
  redis-server:
    image: 'redis' # using redis image
  node-app:
		restart: always # restart policy
    build: . # look in current dir and build
    ports:
      - "4001":"8081" # our port in local machine map to container port
after that, in terminal run
docker-compose up
and there we go, our containers are running.
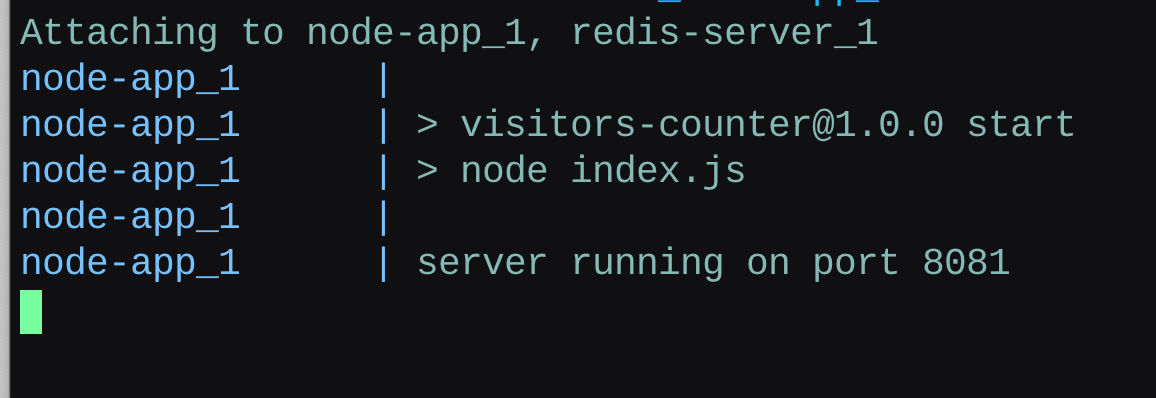
Let’s visit http://localhost:4001/ you’ll see

If we want to stop all containers, we’ll run a command
docker-compose down
Summary
- Docker can be used in many operating systems
- Docker consume less resources than Virtual Machine
- Reduce the problem of working in different environments (or different OS)
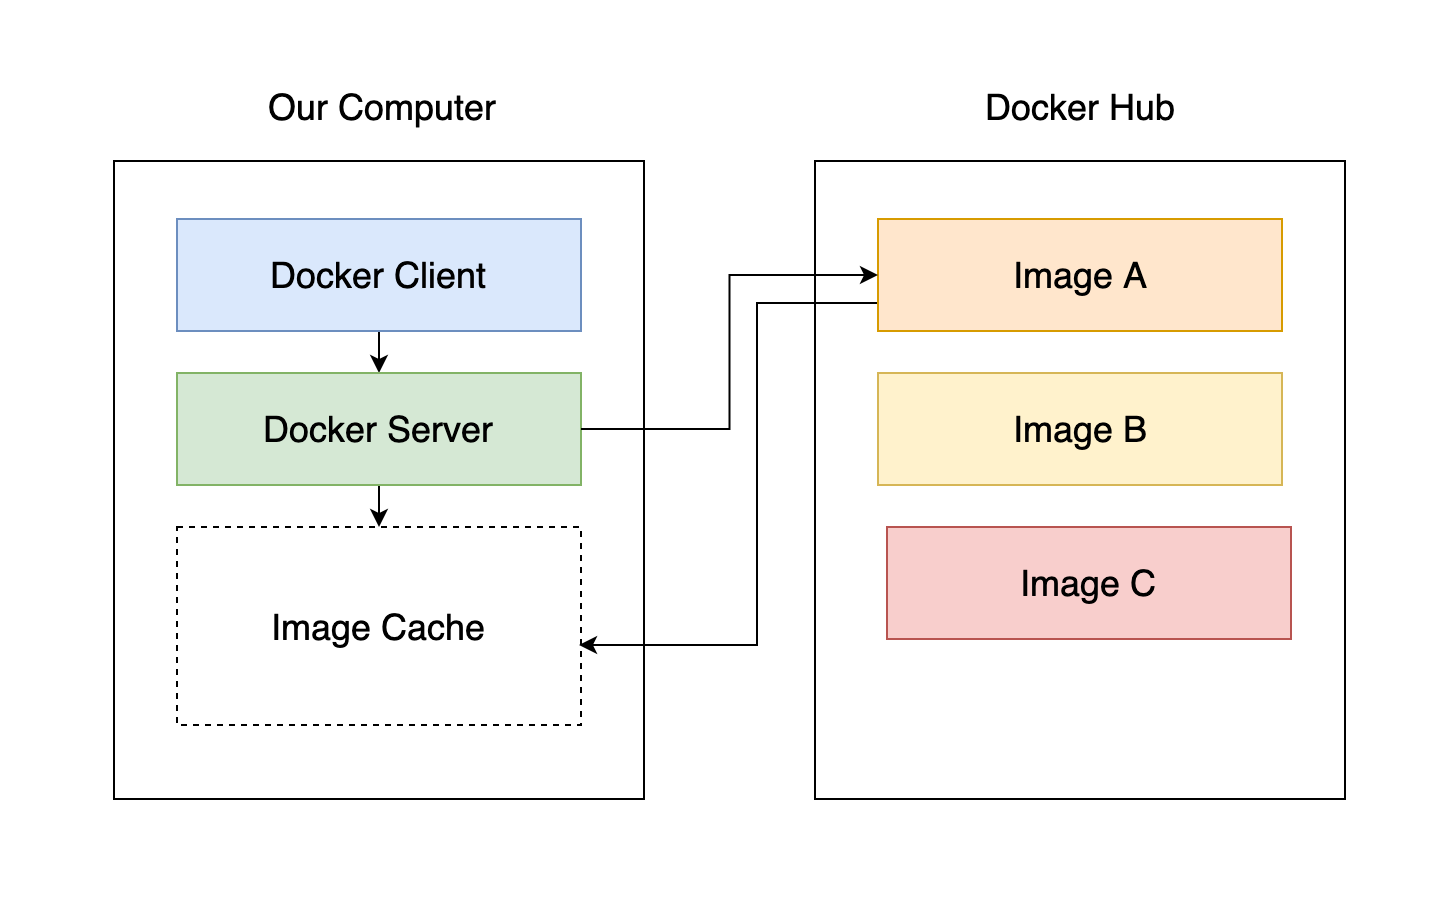
- We can choose to use different docker images created by people from the central Docker registry like Docker Hub which can reduce development time consuming.
I hope it will be useful for anyone who is studying Docker. Personally, I use Docker for almost application in everyday life either my full-time job or side project. Next time I’ll write a blog post about application deployment using Docker and integration with cloud provider. Happy Coding :)
Credits and References
- Docker and Kubernetes - The Complete Guide
- Docker Engine FAQ
- How is Docker different from a virtual machine?
- Introduction To Docker: A Beginner’s Guide
- Docker คือ … (เริ่มต้นกับ Docker)
- https://docker-curriculum.com
- DevOps with Docker
- 50 Must-Prepare Docker Interview Questions and Answers in 2021
- Docker in 5 minutes
Comments